Multi-Peer Mode
Overview
Multi-Peer mode allows Fusion to instantiate multiple completely independent NetworkRunner instances with their own associated Fusion Simulation, Physics scene, Network Connection, and Scenes inside of a single Unity Editor instance.
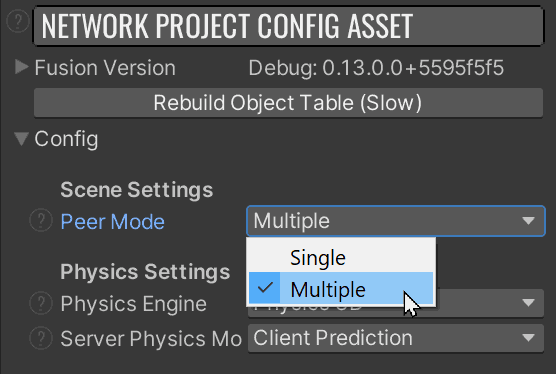
Multi-peer mode can be enabled by selecting Fusion > NetworkProjectConfig from the top Unity Editor menu, and then setting Peer Mode to Multiple.

The ability to run multiple peers (NetworkRunners) in one Unity instance allows for:
- testing multiple clients in the editor, without needing to make multiple builds or run additional Unity editor instances.
- dedicated servers which can serve multiple Game Sessions from a single Unity instance.
- clients which can connect to multiple Game Sessions simultaneously.
NetworkRunner Visibility
NetworkRunner visibility is only applicable to Multi-Peer mode. By default all peers are visible. When scenes are loaded or objects are spawned, they are registered with the NetworkRunner's visibility system which automatically finds renderers, audio sources and any other components that constitute visibility to a given peer.
RunnerEnableVisibility Component
IMPORTANT: The RunnerEnableVisibility component must be added to the NetworkRunner GameObject/prefab in order to have visibility control. When this component is present on the NetworkRunner, all attached NetworkObjects (both spawned and scene NetworkObjects) and all regular GameObjects on the scene (Not instantiated) will be scanned for components which are considered to be cosmetic, and those components are added to a list associated with that runner. These items are then enabled and disabled by the NetworkRunner.SetVisibility(bool) method.
GetVisible() and SetVisible(bool)
When running in Multi-Peer mode, NetworkRunner.SetVisible(bool) will enable and disable all rendering/audio/etc components which have been associated with that NetworkRunner. This allows devs to hide and show GameObjects associated with a runner, without affecting code execution of that runner.
EnableOnSingleRunner Component
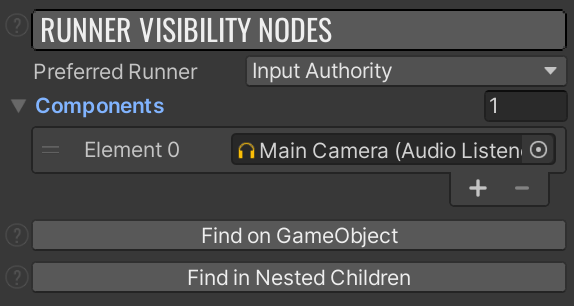
This component automatically adds a RunnerVisibilityLink component for each component listed in the Components field. These indicated components will be limited to a single enabled instance when running in Multi-Peer mode. This is particularly important for components which Unity intends to be singletons, such as AudioListeners and EventSystems.

Preferred Runner
Selects which Runner peer type should be prioritized as visible when multiple NetworkRunners are active.
Components
The components currently flagged as single instance only. Any components here will be disabled on all but one peer.
Network Runner Controls Window
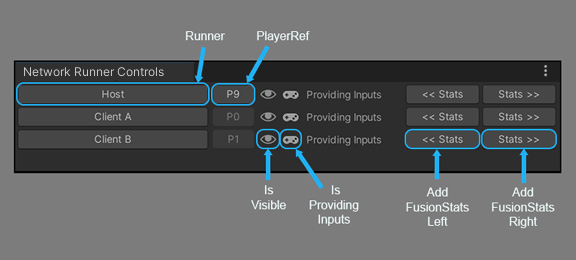
The Network Runner Controls window can be opened through the Tools > Fusion > Windows > Network Runner Controls menu and provides tools for showing/hiding runners, as well as controlling which runners collect user input. There are also quick-access buttons for creating a new FusionStats overlay for any active runner.

Clicking a NetworkRunner's name in the list will ping/select that NetworkRunner instance in the scene.
The NetworkRunner.PlayerRef.PlayerId is displayed next to the NetworkRunner name. If a PlayerObject has been assigned to the NetworkRunner, clicking this will ping/select that player GameObject in the scene.
Multi-Peer Integration Example
- Hathora with the Simple FPS sample