Bolt 103 - Properties & Callbacks
In Bolt 101 and Bolt 102 we learned the basics of getting Bolt running, how get some properties and game objects replicating over the network. In this part we will look at how we go about replicating (serializing) properties over the network.
When we created our Cube prefab, and the state CubeState for it, we've added a property called CubeTransform.
Now it's time to use the property and introduce ourselves to coding Bolt entities.
Start by creating a script called CubeBehaviour in the Tutorial/Scripts folder and open it up in your text editor of choice.
Remove the default Unity methods and have the class inherit from Bolt.EntityBehaviour<ICubeState> instead of the normal MonoBehaviour.
C#
using System.Collections;
using System.Collections.Generic;
using UnityEngine;
using Bolt;

public class CubeBehaviour : Bolt.EntityBehaviour<ICubeState>
{
    // Your code here...
}
Before we go into adding any code inside CubeBehaviour let's look at what exactly Bolt.EntityBehaviour<ICubeState> does.
ICubeState is a C# interface created by Bolt automatically when you run Bolt/Compile Assembly, that exposes all of the properties you have defined on the state.
This gives you easy and statically typed access to all properties of your states.
The class we inherit from, which is defined as Bolt.EntityBehaviour<T> in the Bolt source code, takes the type of the state we want to use as it's generic parameter, this just tells Bolt the type of the state we want to access inside our CubeBehaviour script.
As with the Bolt.GlobalEventListener class from Bolt 101, the Bolt.EntityBehaviour<T> class inherits from MonoBehaviour and you can use all normal Unity methods here too.
We are going to implement a specific Bolt method called Attached, you can consider it as the equivalent of the Start method which exists in Unity, but it's called after the game object has been setup inside Bolt and exists on the network.
C#
using System.Collections;
using System.Collections.Generic;
using UnityEngine;
using Bolt;

public class CubeBehaviour : Bolt.EntityBehaviour<ICubeState>
{
    public override void Attached()
    {
        // Your code here...
    }
}
Important: Like the SceneLoadLocalDone method from Bolt 101 we use the public override ... version to methods and not the way Unity does it.
Inside the Attached method we are going to add a single line of code: state.SetTransforms(state.CubeTransform, transform);, lets break it down:
state.- This part accesses the state of the entity, which isICubeState;transform- The transform of the GameObject;CubeTransform.- Here we access theCubeTransformproperty we defined in the state in theBolt AssetsandBolt Editorwindows;SetTransforms- Here we tell Bolt to use the transform of the current game object where theCubeBehaviourscript is attached to and replicate it over the network.
The complete sample should now look like this.
C#
using UnityEngine;
using System.Collections;
using Bolt;

public class CubeBehaviour : Bolt.EntityBehaviour<ICubeState>
{
    public override void Attached()
    {
        state.SetTransforms(state.CubeTransform, transform);
    }
}
We're going to add some very simple movement code to our CubeBehaviour, we could use just the normal Unity void Update() ... way of doing things, but Bolt provides another method we can use called SimulateOwner.
We implement SimulateOwner in the same way we did with Attached and add the movement code inside of it.
C#
using UnityEngine;
using System.Collections;
using Bolt;

public class CubeBehaviour : Bolt.EntityBehaviour<ICubeState>
{
    public override void Attached()
    {
        state.SetTransforms(state.CubeTransform, transform);
    }

    public override void SimulateOwner()
    {
        var speed = 4f;
        var movement = Vector3.zero;

        if (Input.GetKey(KeyCode.W)) { movement.z += 1; }
        if (Input.GetKey(KeyCode.S)) { movement.z -= 1; }
        if (Input.GetKey(KeyCode.A)) { movement.x -= 1; }
        if (Input.GetKey(KeyCode.D)) { movement.x += 1; }

        if (movement != Vector3.zero)
        {
            transform.position = transform.position + (movement.normalized * speed * BoltNetwork.FrameDeltaTime);
        }
    }
}
The code inside SimulateOwner is pretty much standard Unity stuff, very simple.
The only thing which is Bolt specific is the BoltNetwork.FrameDeltaTime property.
Currently this simply wraps the built-in Unity Time.fixedDeltaTime property, but it's still recommended to use the Bolt version for future compatibility.
Before we continue, let's take a step back and look at what SimulateOwner actually is.
The computer which called BoltNetwork.Instantiate will always be considered the Owner (see Who is Who? for more info) and this is where SimulateOwner will be called, and only called on that computer.
This means we can write specific code for movement or other things that should only run on the computer that has instantiated a prefab, without the need for any networkView.isMine checks.
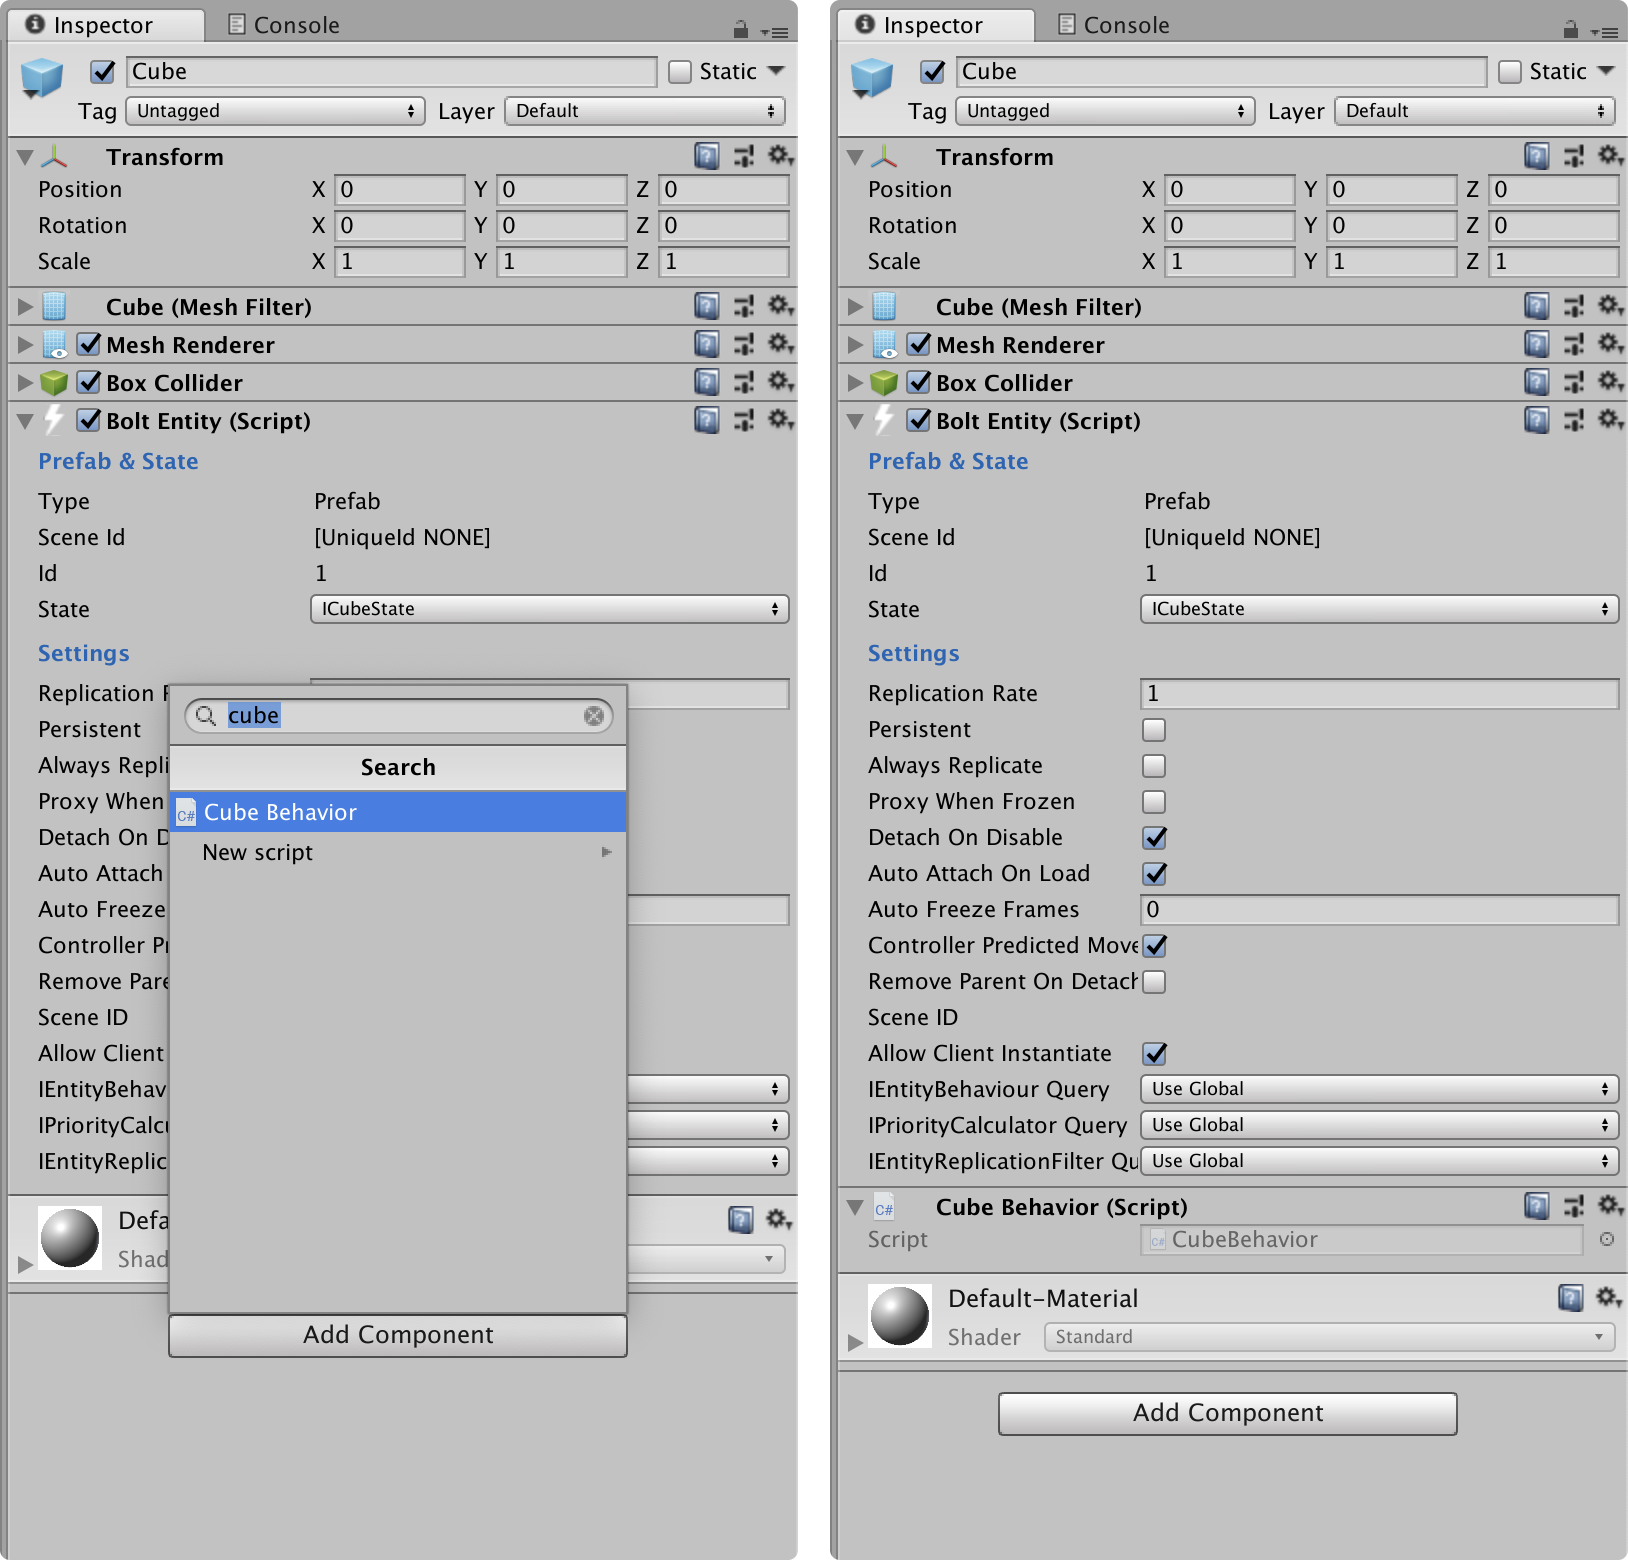
The last thing we need to do before starting our game is to just attach our CubeBehaviour script to our Cube prefab.
If you build your game now and start up two instances, one server and one client (or more), you will be able to move the Cube around and it will properly replicate over the network.
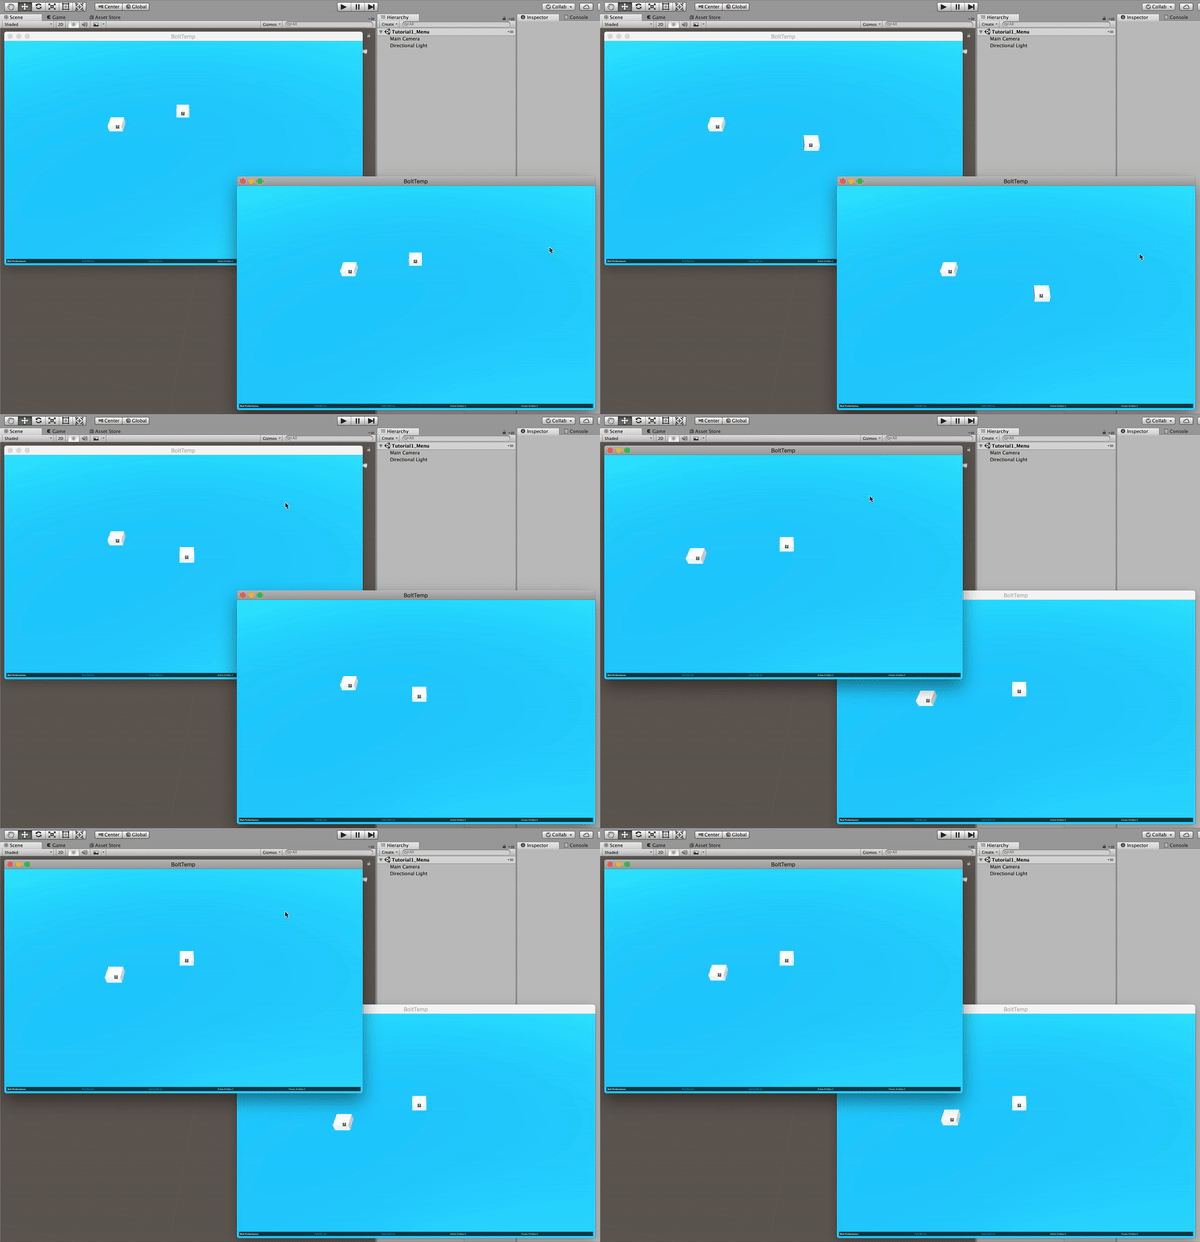
You might notice that the remote cube stutters a bit, it's not interpolating smoothly and instead "snapping" to it's new position.
Bolt has built-in features for handling this, so let's enable them!
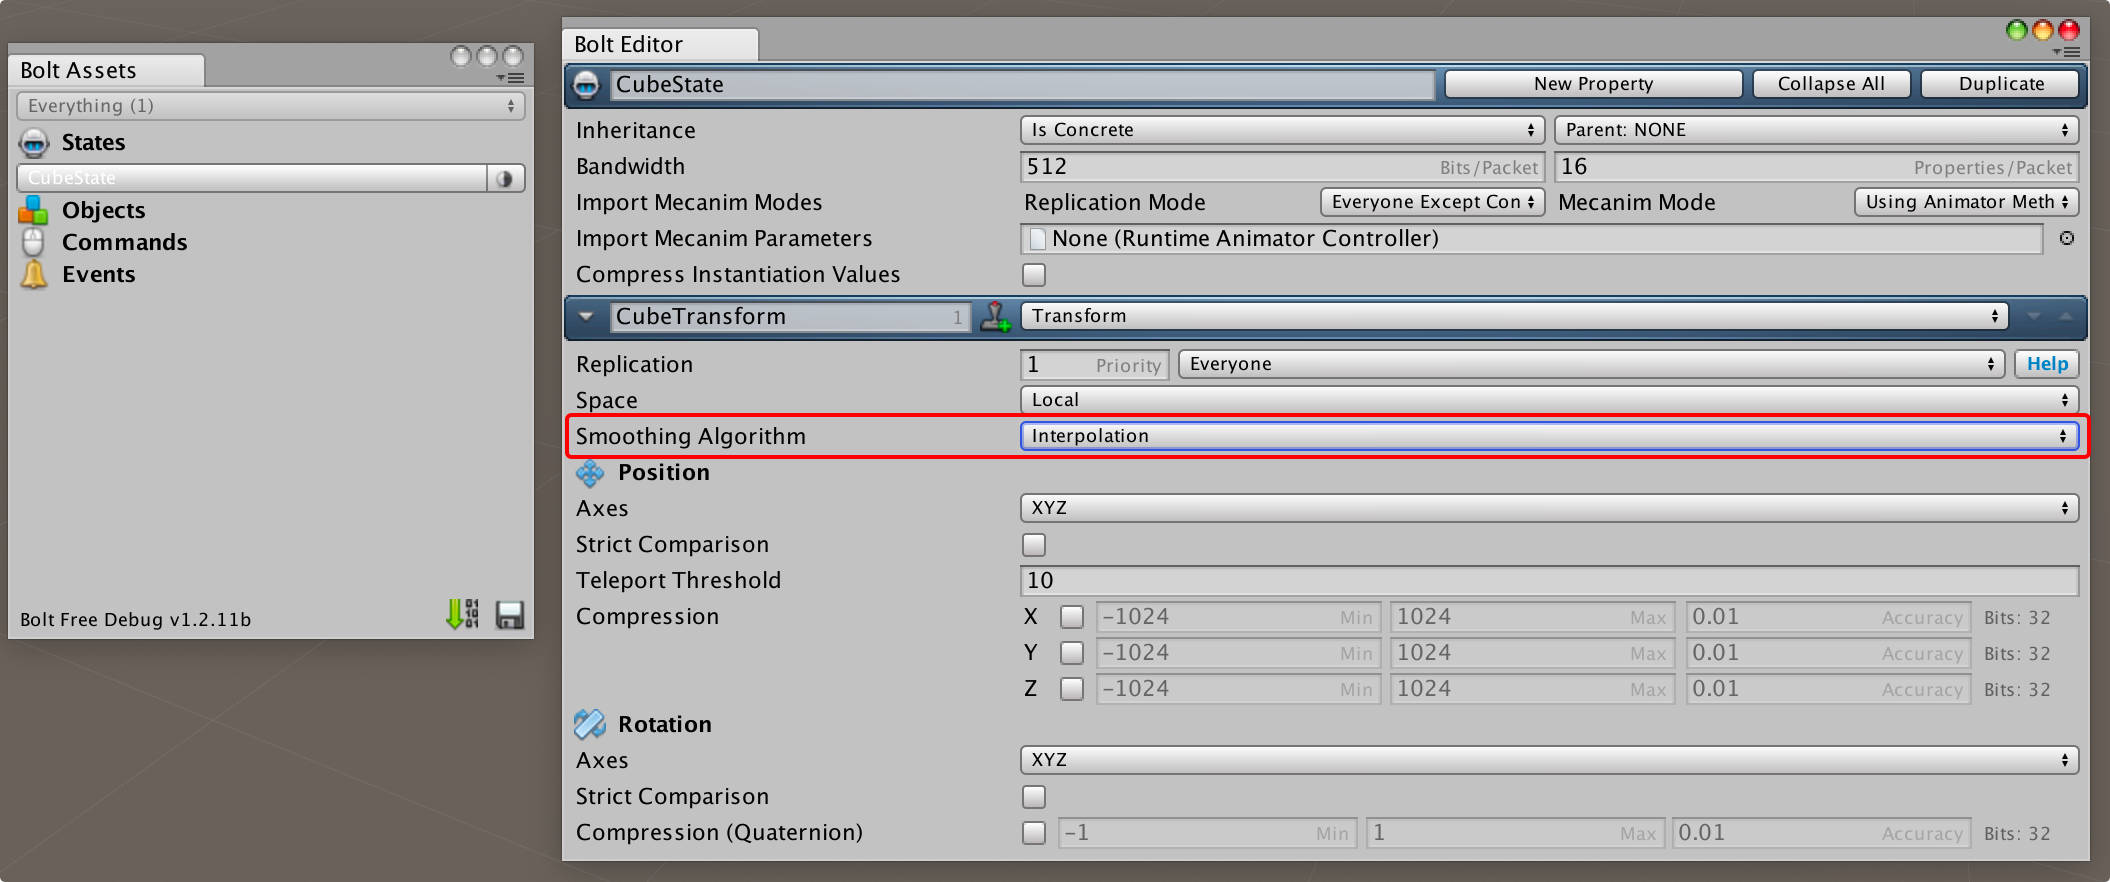
The first thing we should do is to enable Interpolation for our CubeTransform property on our CubeState.
Open the Bolt Assets window from Bolt/Assets if it's not already open and click on the CubeState to begin editing it.
Find the Smoothing Algorithm field under the settings for our CubeTransform property, switch it from None to Interpolation.
Now compile Bolt again to make it aware of the changes, either by clicking on the green arrow in the Bolt Assets window or running the Bolt/Compile Assembly command.
You can now build and start the game again, and you will see that the cube now interpolates smoothly for the other player.
Bolt has further advanced features to remove what's usually reffered to as 'micro stutter', for now we will skip these as they are not required when just starting out and is usually the final touches you add at the end of your game.
Important: If the cube is still stuttering for you make sure you ran the Bolt/Compile Assembly command.
Currently in our game it's a bit difficult to see which cube you are controlling, as they both look exactly the same with no way to distinct them from each other. Let's fix this with some colors!
Open up the CubeState in the Bolt Editor and click New Property, name the property CubeColor and set the type of it to Color.
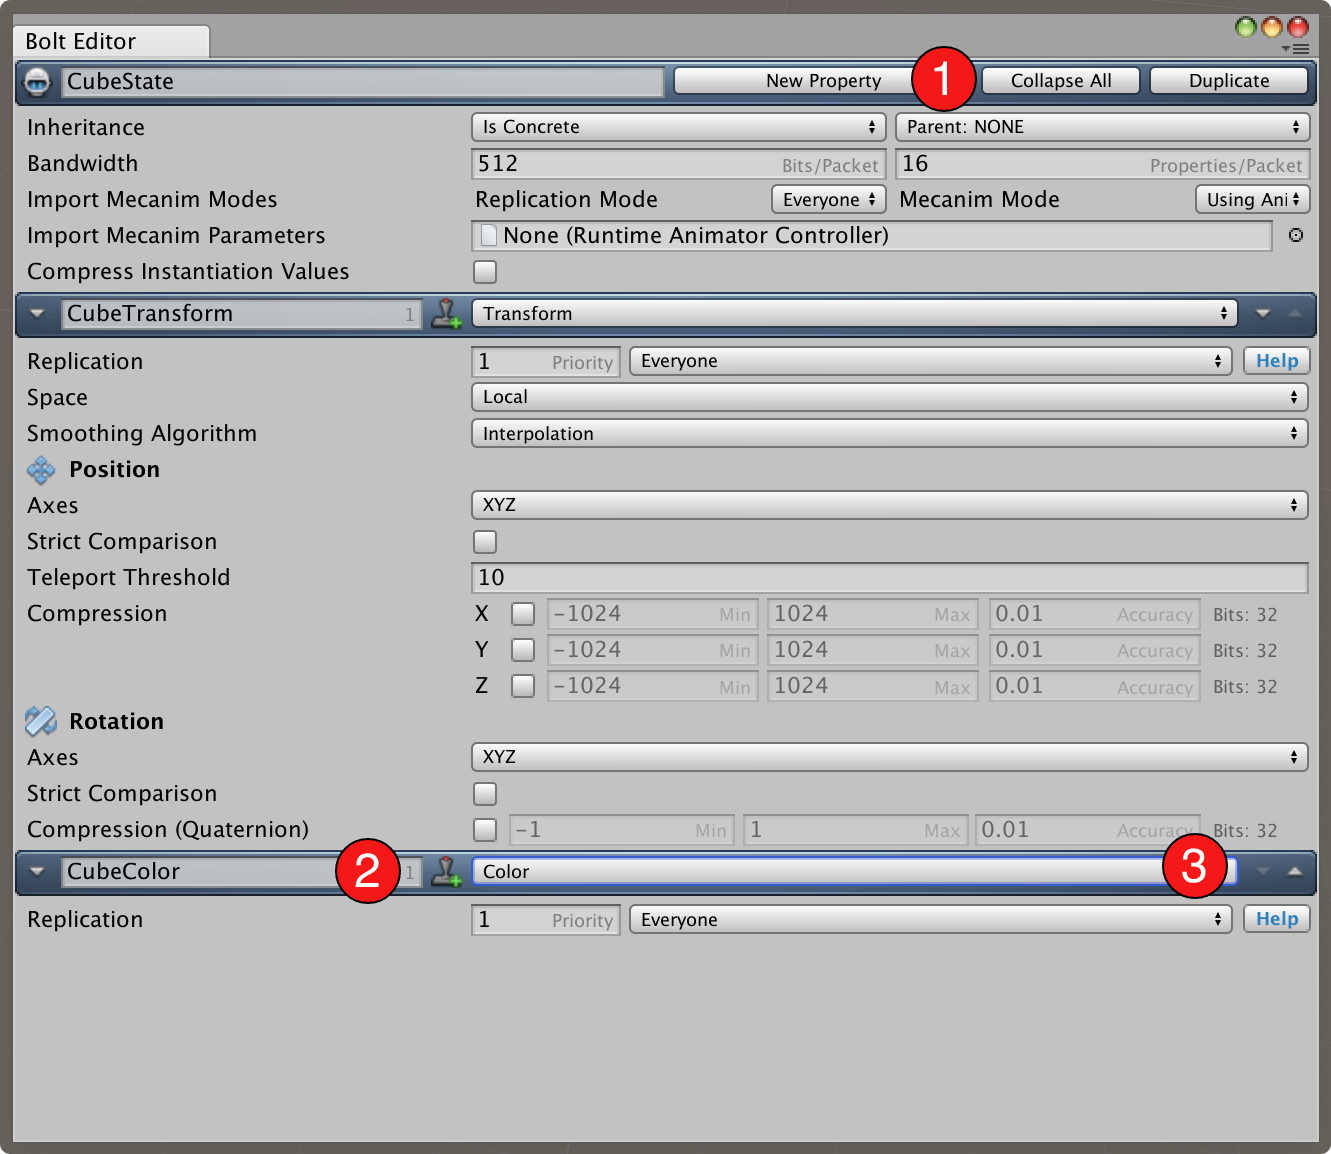
After this, make sure to run the Bolt/Compile Assembly command again.
In the CubeBehaviour class and inside our Attached method we are now going to add a couple of lines of code which randomizes a color for each cube.
C#
// ...
public override void Attached()
{
    state.SetTransforms(state.CubeTransform, transform);

    if (entity.IsOwner)
    {
        state.CubeColor = new Color(Random.value, Random.value, Random.value);
    }
}
// ...
The new code is the if-statement and the line of code within it.
The reason we check for entity.IsOwner is that we only want to do this on the person that instantiated the object, not everyone.
Some of you may be asking: So why not use SimulateOwner then? That would let us write code that runs only on the owner, correct.
But that also executes every frame, which we don't need.
There is no special AttachedOwner callback because most of the code in attached will be the exact same for everyone.
So far so good, we are setting the color on the owner only but we're not doing anything with it currently.
Now we get the chance to look at another feature: Property Callbacks.
Property callbacks simply let you hook up a method to be invoked whenever a property changes value.
First let's create a new method called ColorChanged which takes our color from the state.CubeColor and assigns it to the Renderer's material.color property.
C#
// ...
void ColorChanged()
{
    GetComponent<Renderer>().material.color = state.CubeColor;
}
// ...
Simple enough. At the end of our Attached method we are going to hook up our ColorChanged method so that it's called whenever the state.CubeColor property changes.
C#
// ...
public override void Attached()
{
    state.SetTransforms(state.CubeTransform, transform);

    if (entity.IsOwner)
    {
        state.CubeColor = new Color(Random.value, Random.value, Random.value);
    }

    state.AddCallback("CubeColor", ColorChanged);
}
// ...
The last line in Attached that reads state.AddCallback("CubeColor", ColorChanged); is the key, currently you have to type out the property name, in this case "CubeColor" in a string (we are working on making this statically typed also).
We're going to add one last thing before we run the game again, inside our CubeBehaviour add a Unity OnGUI method which looks like this.
C#
void OnGUI()
{
    if (entity.IsOwner)
    {
        GUI.color = state.CubeColor;
        GUILayout.Label("@@@");
        GUI.color = Color.white;
    }
}
And here is the entire source code for CubeBehaviour.
C#
using System.Collections;
using System.Collections.Generic;
using UnityEngine;
using Bolt;

public class CubeBehaviour : Bolt.EntityBehaviour<ICubeState>
{
    public override void Attached()
    {
        state.SetTransforms(state.CubeTransform, transform);

        if (entity.IsOwner)
        {
            state.CubeColor = new Color(Random.value, Random.value, Random.value);
        }

        state.AddCallback("CubeColor", ColorChanged);
    }

    public override void SimulateOwner()
    {
        var speed = 4f;
        var movement = Vector3.zero;

        if (Input.GetKey(KeyCode.W)) { movement.z += 1; }
        if (Input.GetKey(KeyCode.S)) { movement.z -= 1; }
        if (Input.GetKey(KeyCode.A)) { movement.x -= 1; }
        if (Input.GetKey(KeyCode.D)) { movement.x += 1; }

        if (movement != Vector3.zero)
        {
            transform.position = transform.position + (movement.normalized * speed * BoltNetwork.FrameDeltaTime);
        }
    }

    void OnGUI()
    {
        if (entity.IsOwner)
        {
            GUI.color = state.CubeColor;
            GUILayout.Label("@@@");
            GUI.color = Color.white;
        }
    }

    void ColorChanged()
    {
        GetComponent<Renderer>().material.color = state.CubeColor;
    }
}
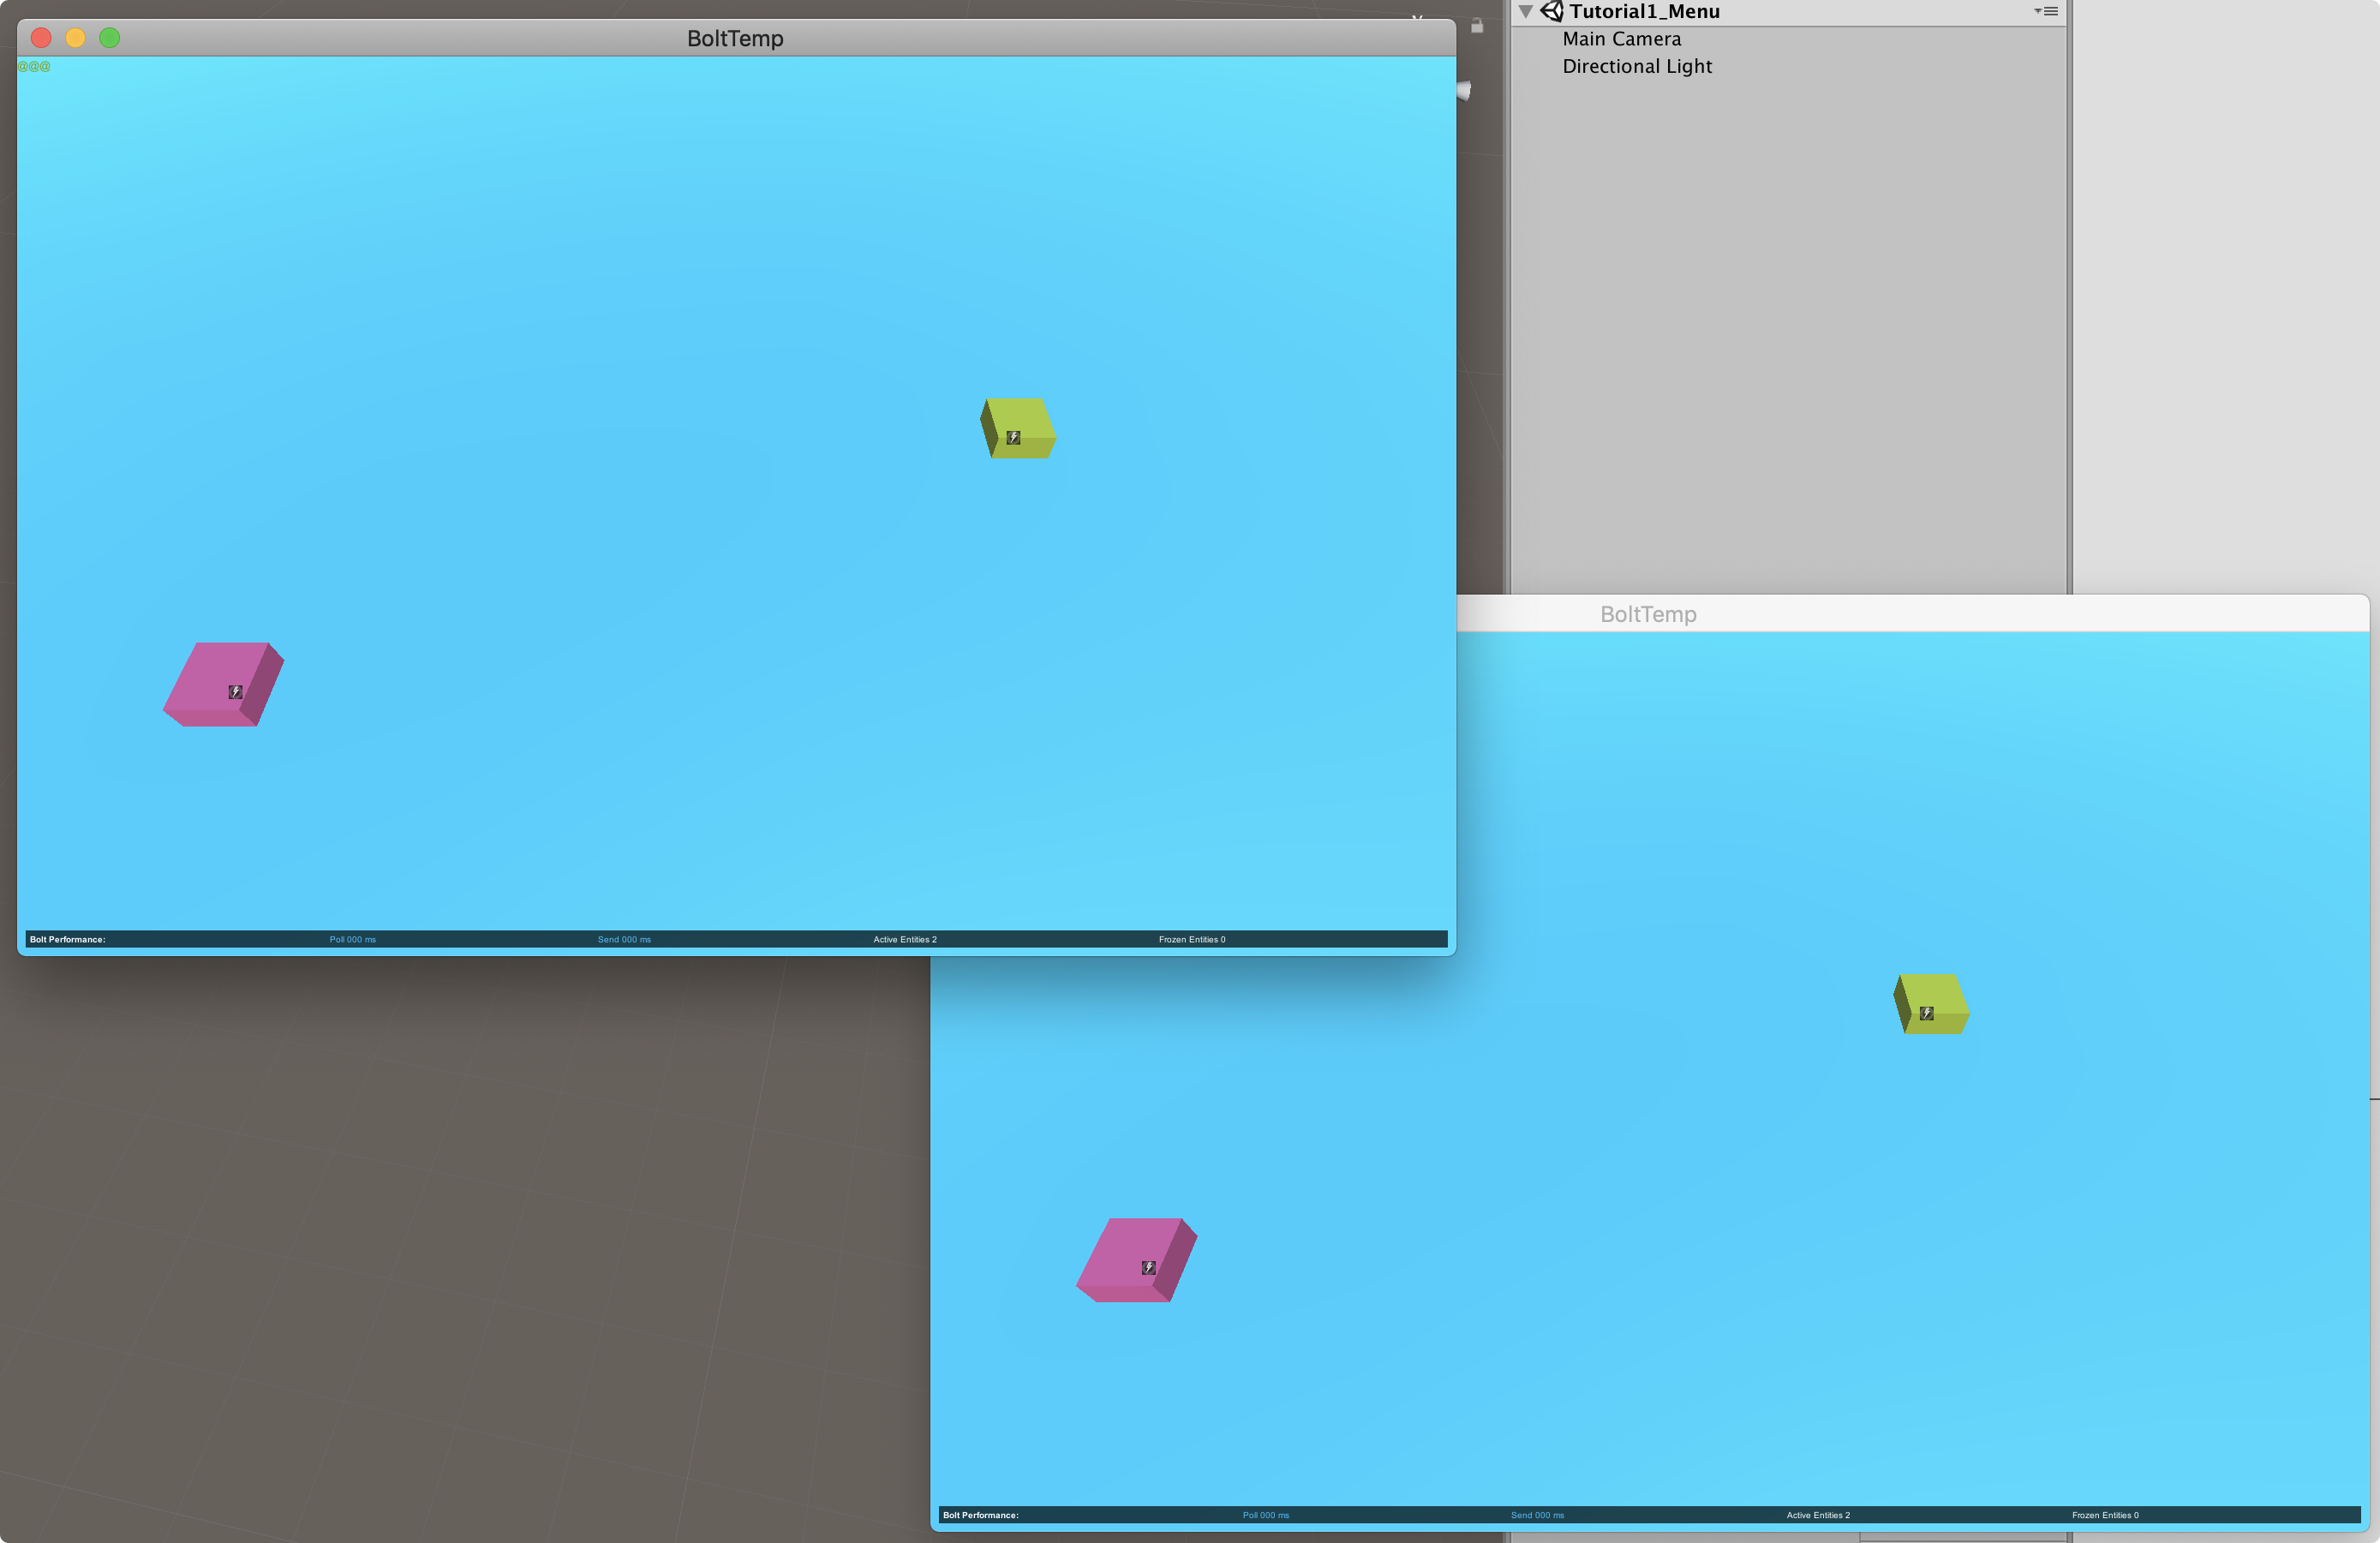
Now when you build and run your game, it will look something like in the picture below.
Continue in next chapter >>.
Back to top